 Home
HomeThe Journey for Gluten Free Sourdough
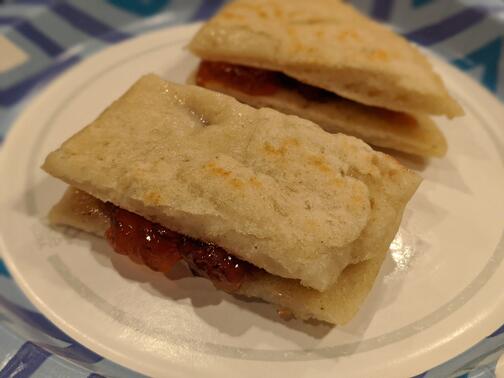
It resembles bread!

Statement of Hubris
I got diagnosed with celiac about a month before the covidacolypse. Ironically, I was just buying the supplies and tools for getting into making homemade bread (Sourdough specifically) After some initial mourning, I set out to figure out gluten free bread. I'm not a baker or culinary expert of any kind, and this is my testament of 3 months of my life spent obsessing over gluten free sourdough as a dilettante.
After researching bread-making, both gluten free and otherwise, I came to a depressing conclusion: gluten is intrinsic to "bread".
10,000 years ago humans started cultivating a particular type of grass from western Asia. The primary motivation of picking the seeds of "that" particular grass, was a long chain protein that gave the resulting mush a unique structural integrity. When combined with yeast, that structure trapped bubbles of air inside, and provided enough integrity to essentially inflate into balloons. Warm and fluffy delicious gluten-y balloons.
America's Test Kitchen has a great video on what gluten does in bread.
Now I set forth on the mission to throw 10 millena of selective breeding, experimentation, and perfection of an art to the side and figure out how to make good tasting and pleasantly textured gluten-free bread-like-stuff.
Convincing yeast to live in gluten-free flour
This was honestly the slowest and most frustrating part of making gluten free sourdough. I've been very sensitive to gluten ever since I managed to detox and I was dubious of off-the-shelf baker's yeast (The store was sold out anyway) so I decided to cultivate a wild yeast starter.
First I made the mistake of reading articles on gluten-y sour-dough, which suggested only feeding/replaying out a quarter of the starter and gave me incorrect expectations. King Arthur Flour has a good guide on how to use their flour to make a sourdough starter. I actually had better luck with using the method with Bob's Mill Gluten free flour but not much better. Basically we will be holding a battle-royal to the death for microbes and hoping a decent yeast wins.
Ingredients:
- 1 cup gluten free flour (honestly, use whichever you want)
- 1 cup water. (bonus points if it bottled or distilled water but tap will work eventually)
- A lot more flour and water for all the feedings and starting over when it goes bad.
Directions:
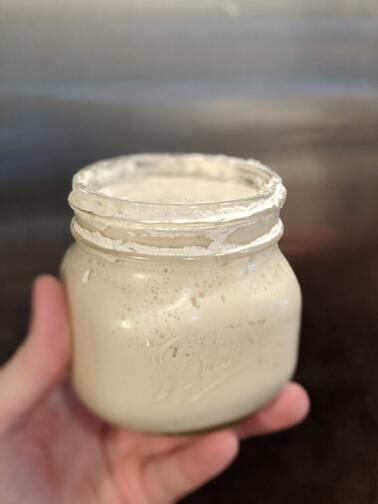
- Put the ingredients into a container that can be “closed lightly” (I used a mason canning jar without screwing the lid on)
- Mix well.
- Stick someplace warm outside of direct sunlight (the sun UV sterilizes things and we want to breed yeast)
- Every day for 1-2 weeks:
- Throw away half the jar's contents.
- Don't eat it! Right now it will taste bad (later it will make good fry bread)
- Replace it with ½ cup flour and ½ cup water
- Mix well
- If the goo looks/smells funny:
- Does is smell like farts?
- Ignore it and keep going, it is the rice flour getting metabolized
- Is there a layer of water on the top?
- Ignore it and keep going. Watch your water-flour ratios, but probably it doesn't mean anything worth changing your behavior.
- Is it fuzzy on top? Are there spots of black or any other color?
- Mold won, throw it away and try again
- Does it smell like rot or make your stomach turn?
- A bacteria won the free-for-all, throw it away and start over.
- If the goo is overflowing the container?
- Does the goo have bubbles and smell slightly sour?
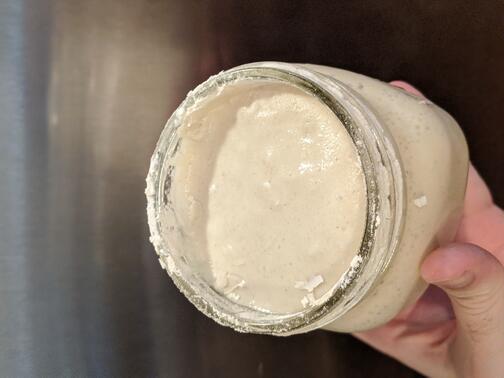
- You have a viable yeast starter! Celebrate by making bread!
- Otherwise
- Get a bigger container and keep on trying. You are probably close to done.
The conventional wisdom for yeast starters applies to keeping it alive. If you leave it out in the kitchen, keep it loosely covered and feed it every day. If you put it in the fridge, feed it once a week (honestly it needs more like every 3-4 days) You can freeze it, but I'd thaw, feed, and give it 12+ hrs out in the warm every month.
Remember, this isn't dough
So lets make some bread!
The trick to this step is that you are not making dough, you are making batter. Your “dough” is going to be rather runny and have no structural integrity whatsoever. We are essentially going to hope it has just enough structure to trap some air bubbles, put it in a pan to make it resemble a loaf of bread, and then bake it before it realizes what we did.
Tools
- A bread pan, high walled.
- An electric mixer (hypothetically it is possible without, but it sucked when I tried)
Ingredients:
- ½ cup yeast starter (preferably at least 6 hrs after last feeding)
- 5 cups gluten-free flour
- Xanthan gum (but your flour-mix probably already has it)
- 2.5 to 3 cups water (gonna have to go by feel here)
- 1½ Tablespoon (the bigger spoon) salt (for flavor)
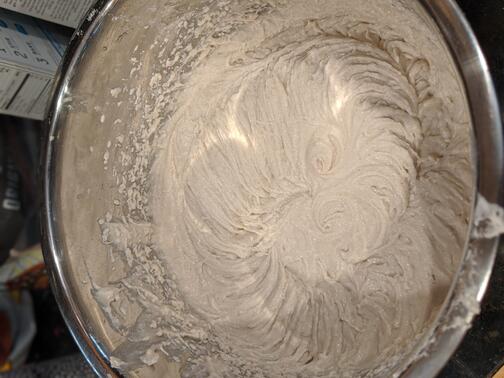
You want this to be as dry as you can get away with, removing moisture later during baking is a challenge but it still will probably be a runny batter. Combine the dry ingredients and starter in a mixing bowl. Add water and attempt to mix. Your goal is to add enough water that the dough is well mixed, and can trap air when you mix it on high. It will probably end up being a bit wetter than what you would expect for gluteny-bread. Do not "knead" the dough. It won’t help. “Whipping” the bread batter with an electric mixer on high will help. Do that.

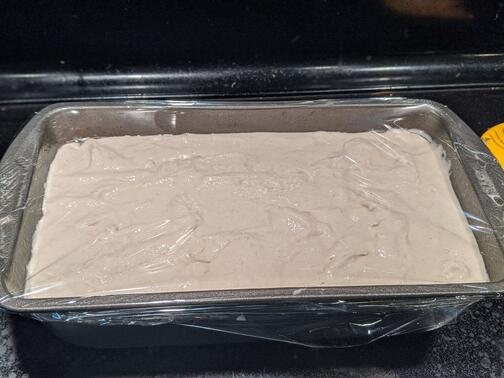
Spray your bread pan with oil (or otherwise grease it) and pour the batter in. Spread it and tap/shake it until it is level in the pan. Spray the surface lightly with oil and cover it with ceran-wrap. Let it sit in a warm place for 6-12 hours. I turn on my stovetop light and leave it under that. It will do nothing except sit there awkwardly for 4+ hours. Around hour 5-6 it will start slowly rising. Somewhere after hour 6 it will suddenly start bubbling and likely overflow your pan. That’s ok. Gently clean it up, the foam is fragile.
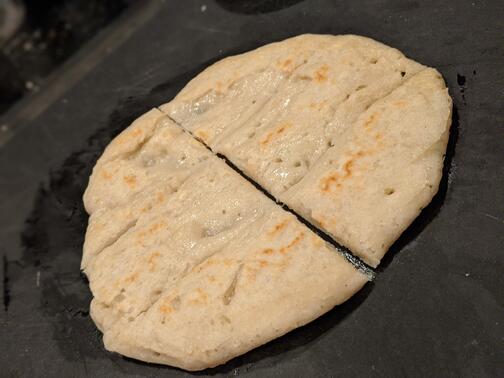
Fry extra bread batter and yeast starter like a pancake for a slightly-sour flat bread that goes great with jam.
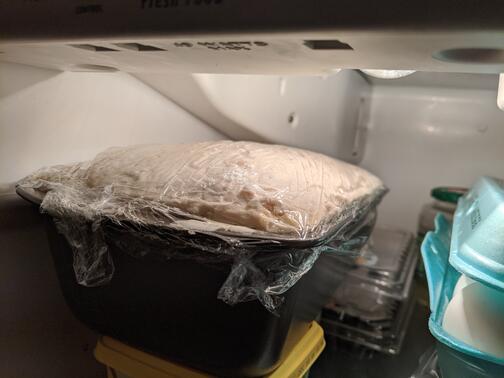
Do not jostle, shake, poke or mix the risen dough. It is holding on to all those bubbles under duress and if you give it the chance it will fall like a souffle. I normally end up gently putting the bread-pan full of risen flour into the fridge and cooking it the next morning.
Baking "Not-Bread"
Set your oven to 450 degrees. In addition to the bread pan, have a cooking tray or baking dish bigger in footprint than the bread pan.
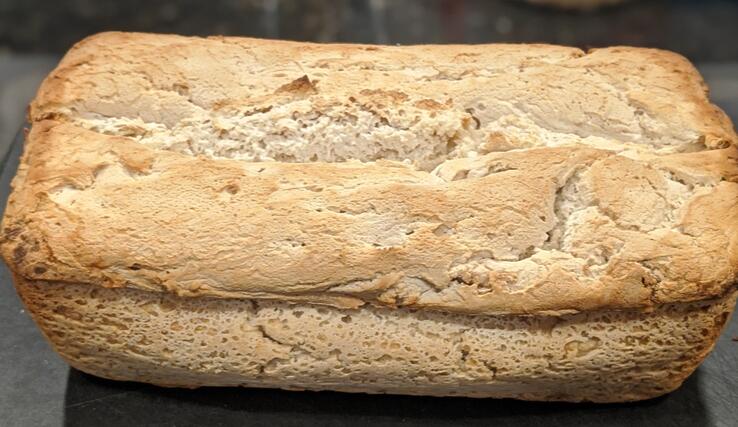
We have a catch-22 to solve here. The bread will firm up and form a very solid crust rather quickly, but that will trap a lot of moisture inside and result in bread-goo. I tried baking it “low and slow” without good results. Rather than do that, we will cook in two phases. The pan that is currently giving the bread structure is a major impediment to getting steam out of the bread. We will bake the bread at 450 for about 20 minutes to do the bulk or the cooking and form a solid crust, then we will remove the bread from the pan and dump it onto the cooking sheet for another 20-40 minutes of cooking.
Use a knife or other pointy thing to draw a line, lengthwise across the batter before you bake it. This will give the bread a “crack” to explode up our though later. More lines, or anything other than “cross the middle” will make it really card to cut the bread later.
Put the bread pan, on the cooking pan (prevents burnt bottom too), in the oven. Allow the bread to cook for 20 minutes. It should have a white-light brown solid crust. Pull the pan out and dump it onto the cooking sheet. I set the bread back upright, but tell me how it goes if you just leave it laying there on it’s side or upside down. Then put the cooking tray and bread back into the oven.
After 20 more minutes, stab the loaf with a wooden skewer or other thin-stabby-thing. If the skewer comes out wet keep cooking. I keep being afraid I will burn the bread. It has never happened, but I have pulled it too early and attempted to eat sad goo-y bread a few times now.
Once you test the bread and have a dry stabby thing afterwards, it is done! Take out the bread and let it cool for at least 10 minutes.
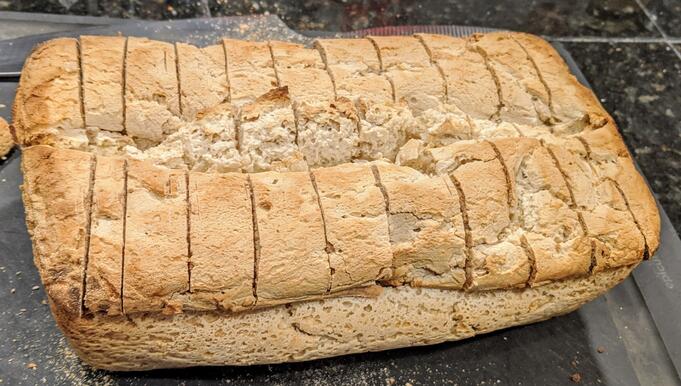
Cutting "Not-Bread"
Even though our “bread” has a very hard crust, it is very brittle. The bread expanding upwards into the “crack” we made has also damaged the integrity of that crust. After shredding a few loaves with my bread knives, I found a system.
You will need 2 knives. A bread knife for the top-crust, and a sharp chopping knife for the rest of the bread. With the bread knife, cut the first half-inch of each slice using a fast sawing motion. “Pre-cut” all the slices this way. Then take the chopping knife, and using each “pre-cut” cut the rest of the slice with a slow knife-drawing motion. The bottom crust will take some pressure and at least one more draw to break through. This way the fluffy warm bread-ish goodness inside is intact.
Serve warm, with butter or fruit jam.
Store in the refrigerator in a sealed container.
Benefit of gluten free bread:
- It microwaves well! Put a teaspoon (the small one) of water on a plate, lay a slice of cold bread on it, and microwave for 30s. It will suddenly be warm and delicious just like it came out of the oven!
Have fun!
Feel free to leave a comment pointing out my dumb mistakes, or your own sourdough recipies